Sunday, January 22, 2012

Bone

Bone was probably one of the first materials used by humans to create sacred objects. It's readily available, fairly easily worked, and even the most primitive societies readily recognize that bones are directly related to the person or animal from which they came. As blood has always represented Life because it comes only from living creatures, bones have always had a connection to Death because they are all that remains of us when we die. Although most of us no longer have mounds of fresh bones cluttering up the kitchen every day, modern Pagans can still use bone in many forms to connect with our Gods and especially our Ancestors.

The simplest and perhaps most beautiful way to use bone in a sacred setting is to place an animal bone or skull on your altar. At Samhain, skulls (either real or sculpted) are de rigeur, but they can be kept on an Ancestor altar year-round. Skulls and bones of animals and birds can be bought in stores or online, or even found in the wild. I have a couple of small skulls (a squirrel and - I think - a skunk) that I just found in our urban back yard. The intricacy and simplicity of skulls makes them quite beautiful, and they can be left bleached white, stained or painted. If you have a totem animal that you connect with strongly, a skull or bone of that specific animal can be a powerful bond, but ultimately all bones connect to our own ancestry at its most ancient.

Bone can also be used as a creative material in many ways. One of the oldest forms of bone craft is scrimshaw, which is simply scratching designs onto bone and staining the markings to make them visible. This is a wonderful way to make amulets and talismans, and the availability of small bone disks and plaques from craft and bead suppliers means you don't have to prepare your own from raw bones. (Which is cheap and fairly easy, but messy and not for the squeamish.) Bone is fairly hard, so you need to use a fairly sharp tool to engrave it. A short-bladed knife or a sharp awl will work, though care is needed to do a neat job and prevent accidents. A Dremel or other motor-tool is excellent for this, though grinding bone with a tiny drill does produce a characteristic smell that may invoke unpleasant memories of dentistry. When you have marked your rune, petition, sigil or other design, paint into the lines with ink or thin paint (India ink is traditional for this, and works very well) and wipe it off the surface to leave only the fine markings darkened.

While at the bead store, you can usually find other kinds of bone beads that are perfect to use in magical crafts. Cylindrical, oval and round bone beads are readily available, as are long tube beads which can be either sewn on or left hanging as pendant decorations. I particularly like these because of the lovely rattling sound they make. (Incidentally, this is the first test of whether beads are real bone or plastic - bone always knocks together with a high-pitched "click", while most plastic sounds dull.) Many suppliers have small Tibetan skull beads carved from bone, which seem inherently magical.

A simple bone craft that you can create, as part of a ritual or just by itself, is a bone cross. I made the one shown here in a workshop with the Niagara Voodoo Shrine a few years ago, and it's a protective charm that can be hung over the door (as I do) or anywhere else in your home to invoke the powers of the dead to protect your home and family. Besides the Ancestral connection of the bones themselves, the shape is a representation of a crossroads, which is a traditional place to petition the dead for help. Any large fowl bones and good for this, turkey, goose or even very large chickens, which can be kept from your next big family dinner (which connects the cross even more closely to your family) or you can buy two large turkey legs, make soup with the meat and use the bones. Clean the bones very thoroughly and put them into a pan with water and a little chlorine bleach to soak for a while. This will sterilize and bleach the bone. Hang them to dry, preferably in the sun, for several days.

To make the cross, simply attach the bones together with a dab of hot glue to hold them while you lash them together with yarn or embroidery thread. White, black or red are all traditional colours for this, or you can use any colours that seem right to you. Tie a small loop onto the top of the upright bone to use as a hanger, and decorate the cross with buttons, beads, cord or anything else that speaks to you. I used old buttons, a plastic skull, glass beads and red leather thongs. As you create the cross, concentrate on your intent to create a powerful protective amulet, and request the assistance of the dead, your own ancestors and those spirits who remain among us, to keep your home safe. The more time you take to add decoration to it, the longer you have to imbue it with your intent as you work.

Hang the cross over the main door or in a central position in your home. You can put it in an out-of-the-way place if you're worried people might think it's creepy, but mine has been hanging in plain sight over our front door for several years and nobody has even noticed it. (Many of us already have enough odd things in our homes that one more won't make much difference!)

Friday, January 13, 2012

A for Altar by Jeanette

Altar: is any structure upon which offerings such as sacrifices are made for religious purposes. Altars are usually found at shrines, and they can be located in temples, churches and other places of worship. Today they are used particularly in Christianity, Buddhism, Hinduism, Shinto, Taoism, as well as LaVeyan Satanism, Thelema, Neopaganism, and in Ceremonial magic. Judaism did so until the destruction of the Second Temple. Many historical faiths also made use of them, including Greek and Norse religion; Information taken from http://en.wikipedia.org/wiki/Altar.


I’m a “born again” Pagan. I wasn’t raised this way but it is the path that I’ve been led down and I love it. I’m currently working on gathering alter tools and learning bits on the different celebrations and enjoying my new path. Any suggestions will be greatly appreciated. Thanks!

Monday, January 9, 2012

(Family) Altar

Our altar is placed in the kitchen; for everyone to see. It's a match of pagan altar and nature's table (from the Waldorf pedagogy). It always reflects what's going outdoor as the Wheel turns. Below is our altar as of now, between Yule and Imbolc.


I never do a by-the-book altar...I don't even own an athamé. Water is represented with seashell and Earth with sand, nuts and even a heart-shaped potato instead of salt. I do have a wax pentacle... I was cleaning one lantern from all the melt wax and a nice thick circle of wax formed, I took the occasion. I include figurines that represent the season, as well as children books for my daughter. She was very thrilled when I introduced the evergreen shaped candle in the beginning of December, telling her we'll light it when there will be snow!

I like how it's not in-you-face but more of a subtle way to decorate for the season. I let my children play with the figurines I put, and actually try the change the scene often to keep them thrilled and interested. As Imbolc comes I will take out the snowdrop fairy I made last year and put their wooden lambs toy on our altar. My daughter is 3 year old now so I'm slowly starting to explain her some things. So for Imbolc I want to explain her how Mother Earth is slowly growing all the flowers and greens in her tummy, so that when snow is gone (usually after Ostara) they will come out of the Earth. I want that to reflect in our altar, and keep it simple for a 3 year old to understand.

This altar is to create for my family something that I quite lacked of as a kid: A sense of Magic, Respect for the Earth, and Celebration of Life.


Kitchen windowsill altar

My simple windowsill altar consist of herbs that do me the favour of not dying after 2 weeks, an oil dispensers with my favourite oil of the moment, lanterns, an offering bowl in which I put pinches of salt and herbs as I prepare the meals, and my tiny red cauldron filled with crystals, stones and matches. (the toothbrush is for washing dishes...you know...). It doesn't really look like an altar at all, but I know it, so that's what's counting. My offering bowl invites me to stop and be thankful and grateful for what I have. The simple lanterns are so welcomed when it's already dark at 4pm, the time I usually cook. They are simple gestures that makes a routine magical and the sight of all my little witchy thing just makes me happy.


What does the letter A inspires you?

Monday, October 10, 2011

Potion Making How-To


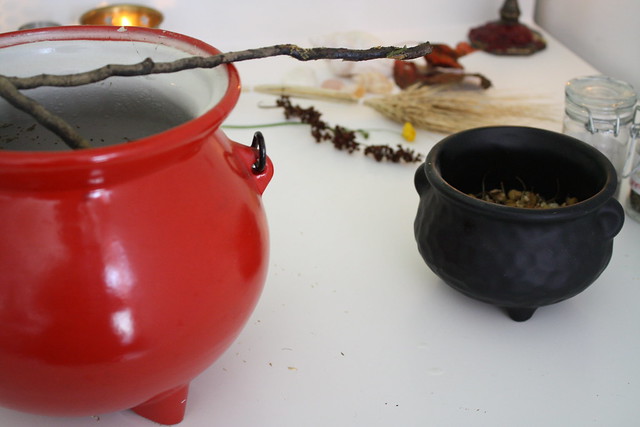
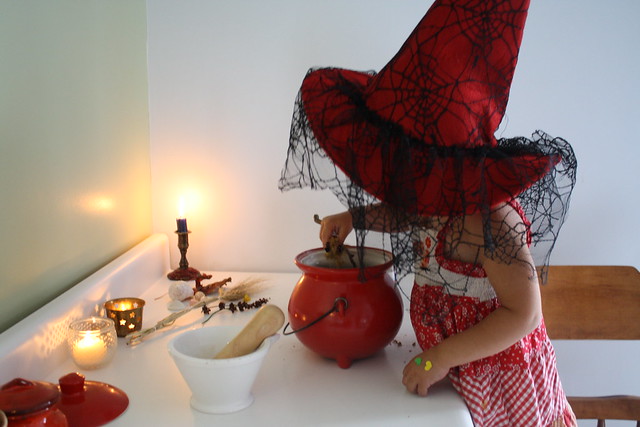
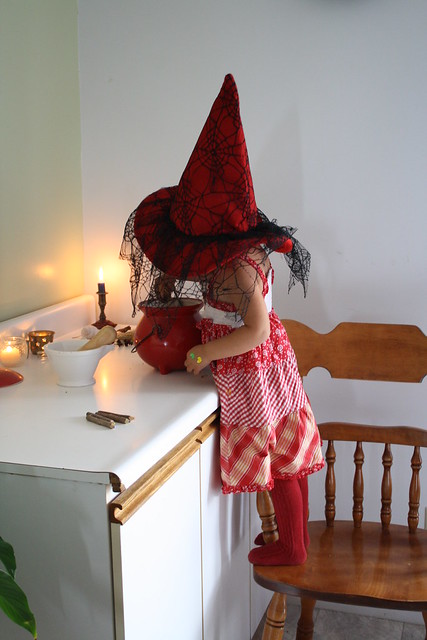
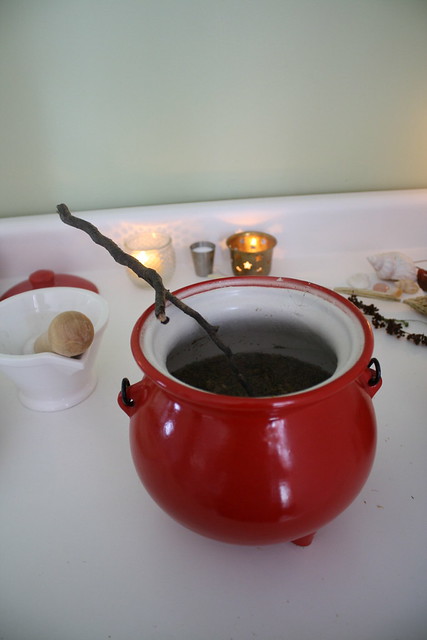
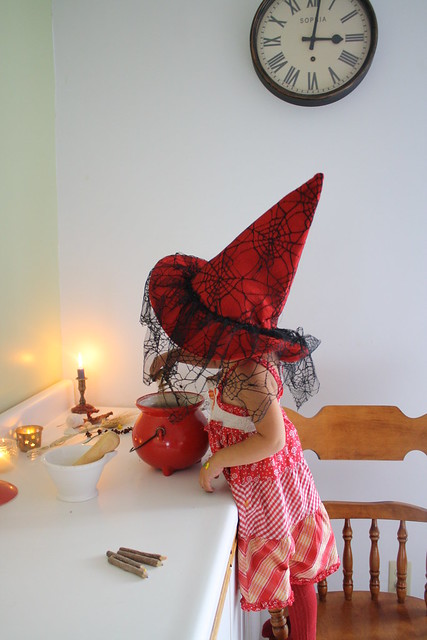
First, making a potion can be very simple, as it can be very elaborate... I better like simple! Since not all of us has access to bonfire in the middle of a meadow or on a shore, I'll propose you something most of us has but seldom use; a chocolate fondue kit. You know the one you can put a tea light under? It makes reasonable size potion and you can safely brew you potion all day long with that. I opted for my big red cauldron in the picture, because.... It makes great pictures ;)


You'll need:
  • Cauldron/Fondu kit/ Pot-pourris Burner
  • Tea light
  • Glass stick, or twig, or wooden spoon (those are great since you can carve symbols into them!)
  • Mortar and Pestle
  • Ideally Spring Water, but boiled tap water can do.
  • Herbs and Essential Oils

Herbs can be substituted by their essential oils, and vice versa. For herbs, you need to crush them hard enough to break them and free their essence, but turning them into dust isn't a necessity.


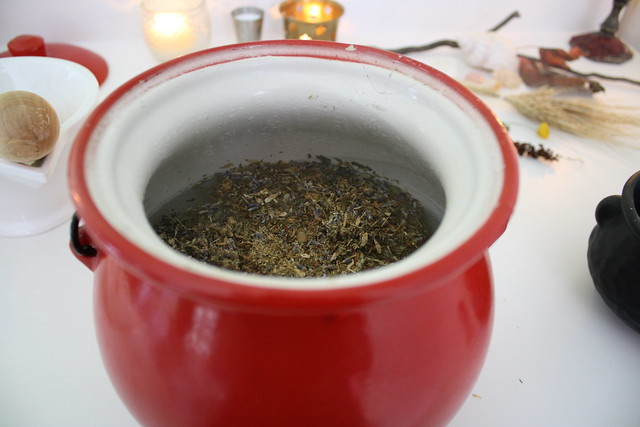
Previously take your water to boil. By the way, if you don't have any fondue kit, you can makey your potion on your conventional oven, you just have to watch it more closely when it brew. Pour it in your cauldron. At his point you can request help from the fire and water element. As a rule of thumb, have about 2 tablespoon of herb for a cup of water. Crush each of them into your mortar and sprinkle on the water. If you feel like strengthening your potion, you can say aloud the name of the herbs/oils you add and why you do so (ex: "Ginger for success", "Rosemary for memory", "Pine for ideas"...).


You can also say something like:

By the Fire and Water,
By the essence of (herb),
Make it as I wish!


When all your herbs and oils are in, let them soak while your think of your goal. Concentrate on it, and when you feel like it's the time, take your stick and stir 3 times; counter-clockwise for banishing potions, clockwise for others. You can also say aloud your goal.


You can also say a more complex incantation, like this one:

By Water and Fire, By the Air and the Earth,
May the hidden powers come to help,
And grant me my wish.
(Ain't it harm none) It is my will, so mote it be!


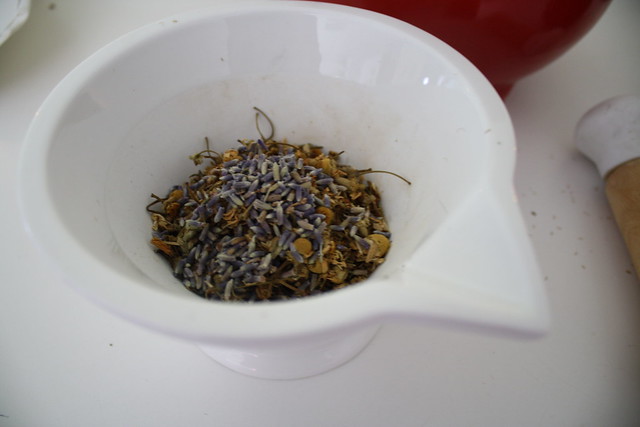
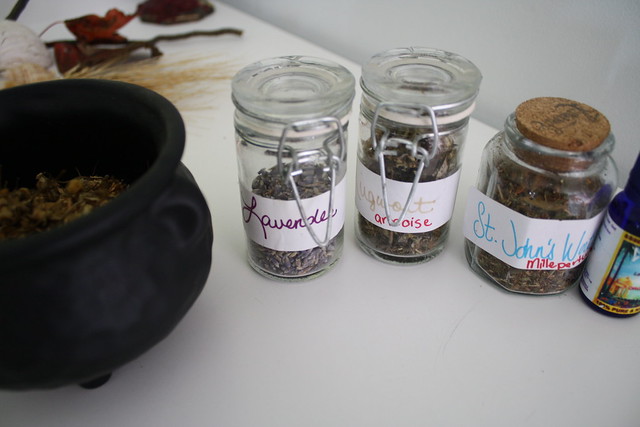
The potion we made in yesterday was:

Calming Potion

Chamomile
Lavender (+ 5 oil drops)
Mugworth
St. John's Worth


Hope you all enjoyed! It is very fun to do and it leaves your house smelling good, so I hope you'll try this at home. It can be a really fun thing to do with the kids (Mariann couldn't stop throwing chamomile until there was no more...). Or just by yourself... It is a very relaxing activity, and if time allows you, you can meditate on it afterwards.


****************************************************

Monday, April 25, 2011

Mini May Pole How to

As Beltane is just around the corner, and I've shamefully abandoned this place since I created it, I thought Wulf wouldn't mind me re-posting a guest post he did on my blog last year. Enjoy this very awesome post about a very awesomely creative men!


When Andréann said she'd love a mini-maypole for Mariann, my first thought was “It'll have to fold up somehow or I'll never be able to mail it.” I imagined something that stood on the floor that the two of them could dance around; it wasn't until later that I realized she'd probably meant a miniature maypole to sit on the table! I've worked as an opera prop builder for 25 years, so a full-size maypole that could fit into a small mailing box seemed a perfectly natural thing to ask for. I often forget that most of the world doesn't work that way.


It also had to be lightweight, and sturdy enough to be played with by a toddler. (I just substituted “to be handled by a tenor” and figured it would be about the same.) I also didn't want it to be too “good”, so it wouldn't be a tragedy if someone's dancing got too energetic and it was damaged. I like cardboard tubes as a building material because they have exactly the needed qualities: they're lightweight, rigid, sturdy and above all, cheap – usually free. So of course I never throw them out, either at home or at work, and was able to find a good one that was about the right diameter and long enough. I cut it into four sections (using a bandsaw, but one of the other nice things about cardboard tubes is that you can easily cut them with just a craft knife.) To join the sections together I needed another tube exactly the right size to fit either into or over them. Of course even in my vast tube collection there was nothing precisely the right diameter, but I did find one that fit over, though a bit loosely.


I cut short pieces about 6" long and glued them onto three of the tube sections, extending about half way past one end of each. (The bottom section would fit onto the base and not need an outer sleeve.) Because the outer tube was slightly large, I built up the end of the smaller tube with a couple of layers of brown kraft paper glued on to make a snug fit. The other ends also needed to be thickened just enough to make them fit precisely but still slide on and off easily. I was originally going to glue on a layer of thin felt, but it was much too thick and with a bit of experimentation I found that a single layer of adhesive cloth tape was exactly right. Easy!


I'd like to say I carefully calculated the optimal width for a stable base, but I have to admit I just made it fit the scrap of plywood I happened to have! I used hardwood marine plywood because it's quite heavy and is much stronger than ordinary construction plywood. That means you can cut it into quite thin shapes without it being too fragile. And one of the problems I had got myself into by making a two-piece slotted base is that the pieces that fit up inside the tube were going to have to be quite thin but would be subject to a lot of stress. If I didn't have to make the base come apart for mailing, I would have just used a circle of ordinary plywood with a piece of wood screwed to it to fit up inside the tube.


The top of the maypole is the part that I would improve. I wanted it to be a pinecone shape, which I made by cutting rows of petals out of stiff paper and gluing them over a styrofoam egg. Even as I was doing it I realized I should have used felt. It would've been easier to shape over the egg so I could have cut larger petals, and would have made a better finished shape.


My original plan was to cover the pole with gift wrap, but when I tried it didn't look very good and was going to be awkward to deal with the raised sleeve sections. In the end I just gave it a base coat of gesso and painted it with acrylics, which was better. Fortunately the cardboard tube already has a spiral seam on it, so it was easy to wrap a strip of paper around to draw out a nice even spiral.


I happened to have three lengths of 1 in. ribbbon in good colours, and tied it onto the top with lengths of ¼ in. ribbon. Little bells onto the ribbons give it a bit of jinglyness.


After it was all assembled I realized I'd made it bigger than was really necessary. I wasn't sure how tall Mariann was, but I knew this would be taller than her. (Though I was surprised to see that it was almost twice her height! So tiny!) But toddlers grow very fast, and the extra height means she'll be able to dance around it for a couple more Beltanes before it's too short. By then I imagine it'll be danced to pieces anyway!


You can find Wulf writing in his blog, Into the Woods...

In the spring of 2008 we bought 40 acres of land just north of Colborne, Ontario. Mostly mixed hardwood forest, with no improvements except a primitive road and a well, it awaits our slow progress from city dwellers to forest folk. This is the record of our journey.

Wednesday, April 20, 2011

Beltane?

Any big plans for Beltane?  I have been crafting and just sent out my WWP Beltane swap parcel.

I have a ritual planed for April 30, getting very excited.